I did this repair on my own car about a month ago, but I didn’t write this article until now because I didn’t think anyone else could benefit from my techniques since it’s pretty obscure. Now, I have written it up, since it seems like a more common issue than I anticipated.
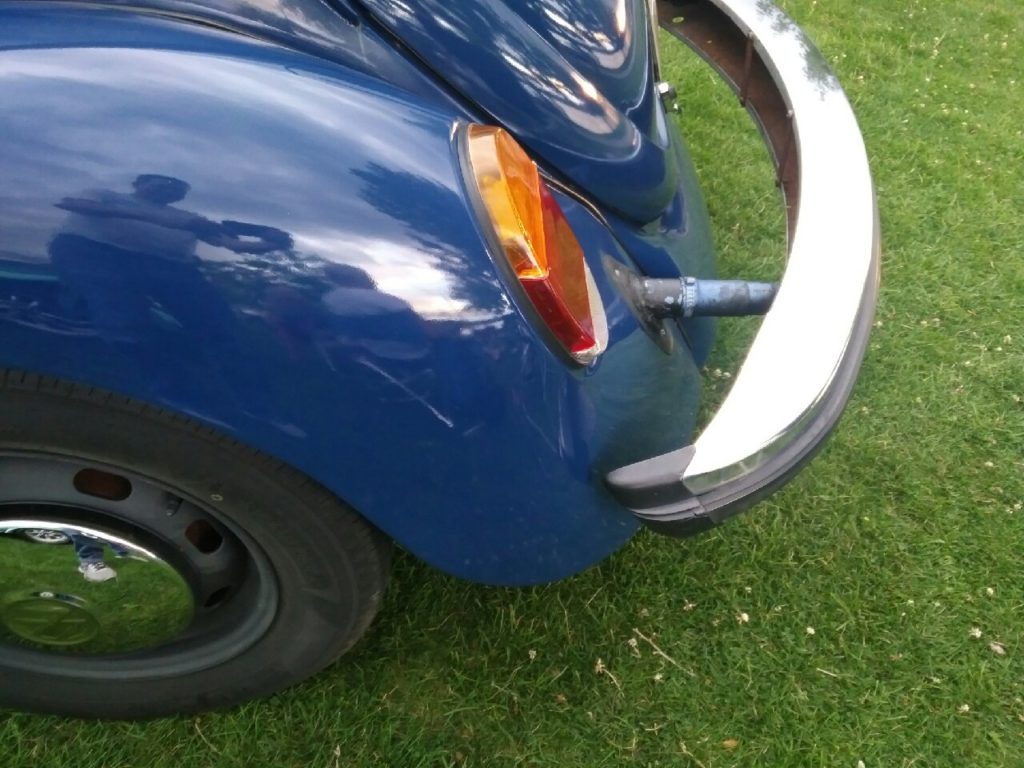
A few nights ago I went to a rather large “cruise night” in Hamilton. It was massive, likely 300 or more cars of all types. It was the last of the season, and the weather looked “sketchy”, but the weatherman said it was going to be good – so I took that as a good sign. I got there probably a couple hours late and “putt-putted” around looking for a space to park. I finally found a space in the back and parked. I had just hopped out of my car when some friendly faces popped up. One of those folks was a friend, Jennifer. She has a late model bug like I have, but interestingly her car also has the same tail lights as my car has. We don’t have the typical late-model tail lights on our cars that you may expect. We should have an “Elephants Foot” style as they are known, due their massive round size on the rear fenders.
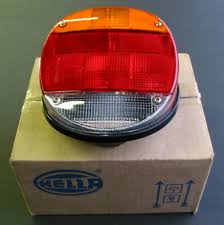
These large housings have been replaced with a flat, “California-Look” style, but there also seem to be “Econo Elephants-Foot” lenses and housings too which have a very similar interior construction.

The issue with the replacements is a form before function problem. They look kinda cool, but the illumination is very poor. Jennifer described some near-beetle crunching experiences because people couldn’t easily see her tail lights. I had not experienced similar, but was likely inevitable had I not done something about it. When looking at these replacement lenses, the only illumination is directly from the bulb. This is an issue because the bulb filament is tiny, where most bulb/reflector/lens configurations emit a much wider beam of light. Another issue with the lenses I have is some fading of the amber turn signal element, likely due to ultra-violet rays. I needed to find a fix so I could keep my cool after-market lenses, while being safe too.
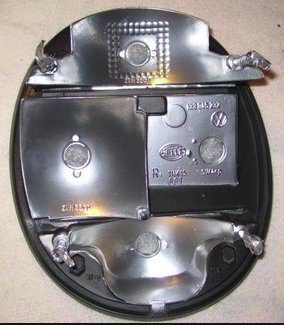
I removed the lenses and I immediately noticed that the back of the housings were not silver or reflective in any way. It was simply black injection molded plastic. There isn’t any reflective qualities about black! I removed the metal bulb bracket by removing the top and bottom screws that attached it.
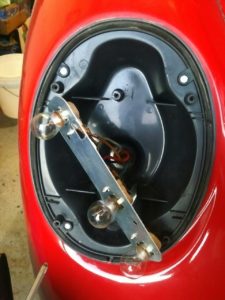
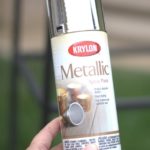
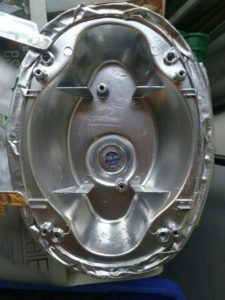
I then noted the wire colours, as I needed those for re-assembly. I then completely removed the “inner” portion of the tail light assembly from the fender, as I was going to paint it. I figured it may be easier to do that, rather than mask the entire back of the car. Once the “inners” were free, I lightly scuffed the black plastic with some fine-grit sand paper. Once the surface was roughed up, I applied some “simulated-chrome” spray paint.
This creates a reflective backing surface for the bulbs. This allows the light that would have been absorbed by the black housing to be reflected back to other drivers behind me.
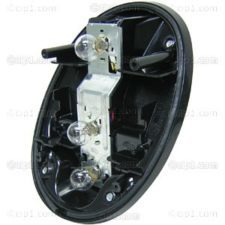
There are probably a few other ways to do this too. On my list of other ideas were; Aluminum Foil Tape, Small Adhesive Mirrors, Mini Aluminum Tart Shell, or something similar. I figured I would try the aluminum paint, and progress from there. I reinstalled the inner housing, installed the bulb-plate and made the electrical connections clean and tight. There are two plastic “dividers” to keep light from spilling from one section to another. I used a little foil tape to seal this better to minimize light leak between the elements.
The next part that needed fixing was the faded amber portion of the lens. Apparently this is an issue on some old cars, and the good folks of the internet have already proposed and tested the solution to this problem – Tamiya Model Paint. It doesn’t seem to be susceptible to ultraviolet light. Tamiya has some pretty cool paints, but I only needed to purchase one colour. Clear Orange X-26.
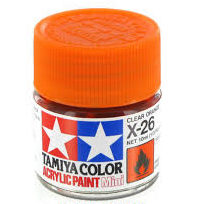
It’s available in Canada at Hobby and Toy Central for a reasonable price. You will need just one bottle for this job. Some folks were using an airbush, or a small spray gun, but this isn’t really needed. We just used a brush and hand painted the inside of the lens. When you paint the inside, the model paint isn’t exposed to the weather, and has a nice smooth appearance from the outside. We did 2 coats.
For bulbs, I didn’t opt for anything like LED bulbs due to the price, directionality, and compatibility issues. A standard bulb should work just fine.
After re-installing the lens on the body of the lamp again, it was time for a trial run. I think they look great and work great!