Have you ever been in the middle of a repair job and torn the gasket you needed to use? Weber carb gaskets are only available in a full kit, and if you need just a gasket, this can be expensive. Sometimes gaskets are no longer available, and you need to salvage what you already have or cut a new one from stock with an razor knife – very carefully!
I recently ran into this issue, and found a high-tech way to solve it online and adapted it. I’ll share my technique, but be forewarned – it’s really geeky!
My wife is an avid crafter, and she has a couple of Cricut machines. A Cricut resembles a computer ink-jet printer, except they are generally set up for cutting. These machines can cut a variety of materials from lightweight paper to heavy weight stock. There are other manufacturers of cutting machines that can even operate with third-party design and cutting software. This can be advantageous as they can import and work with multiple computer file types. I use a file type called SVG (Scalable Vector Graphics). The reason I use the SVG format is clarity. You have probably seen an enlarged digital picture or graphic, it’s very clear when it is small, but when it’s enlarged it becomes blocky and fuzzy, lacking a defined clear edge. A sharp clear edge is absolutely mandatory for a gasket.
Let me take you through how I make a gasket in broad stokes. It takes some trial and error to experiment to get the technique right.
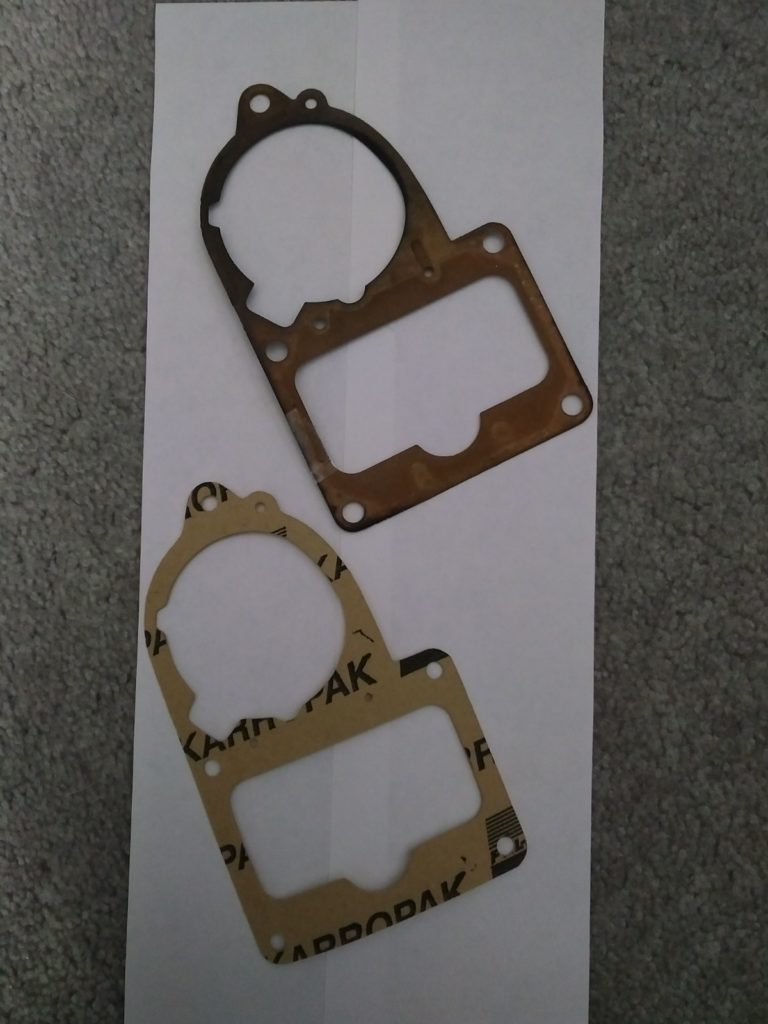
First, I take my gasket and place it on my digital scanner, the same one you might use for pictures. If the gasket was completely missing or too badly damaged, I might put the part directly on the bed of the scanner. I then acquire the image from the scanner in a format such as PNG. (portable network graphic)
Second, I import the file into a free computer program called InkScape. InkScape is a computer graphics program. It’s probably not quite like any other graphics program you may have used in the past. It’s a Vector image editor. It represents the image so it’s made up with nodes. Nodes are the individual points that form the image edge. Kinda like string art, you connect the string point-to-point (or node-to-node) to form the art – this is the same thing I do digitally. You can add, delete, move and reposition the nodes in order to clean up the image. Depending on the quality of the source image, this will dictate how much “post processing” you will need to perform. Once my image is “clean” with crisp edges and round through-holes in the correct places, I save the modified digital image as a SVG. Since it’s in SVG, I can make it a little bigger, or a little smaller without loosing clarity.
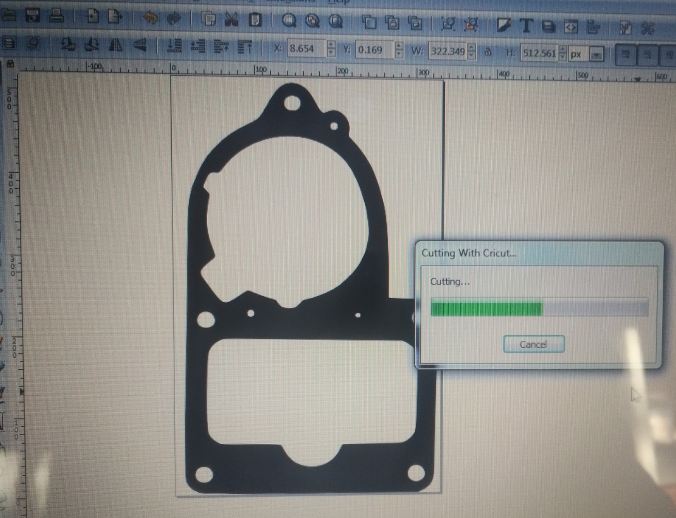
Third, I import the SVG into my cutting machine program. There is a scale on the margin of the image and I use this to calibrate the gasket true size for printing. I use a digital vernier caliper and check the source size and confirm the size on screen, confirming both x and y dimensions. When the image is sized correctly, I try to print a few copies by using up the free space available on the cutting surface. I save my work at this point, in case I would like to produce more gaskets in the future.
Fourth – The cutting surface is a thin plastic mat about the thickness of a credit-card which is covered in a low stick adhesive. This is where to place your gasket media. Since most of my work is small, I use the the small machine to cut with. The mat size is 12″ x 6″ . This allows me to cut most gaskets that might be used on an air-cooled VW except for the transmission gaskets. For that, I may need to use the larger cutter machine (16″ x 24″) which I have not attempted yet. I use bulk gasket material that is fuel/oil tolerant and trim it to place on the small 12″ x 6″ mat.
Fifth – I’m now ready to produce the gasket(s). I tell my cutting software to cut all the lines twice, and I adjust the dials on the cutter machine to apply maximum pressure to the mat surface, and to operate at slow speed. Depending on the number of cuts and the size of your gaskets this can take from 5 to 20 minutes to complete.
Sixth – When the cut is complete, you now need to remove your newly cut gaskets from the adhesive mat and any debris left behind so you can continue to use the reusable cutting mat in the future.
I find the gaskets built using this technique to be just as good, or even better than the commercially available gasket, and this allows you to modify the design to suit your application if required.